Tag Archives: Photography Tips

Photography Etiquette in National Parks

As a professional photographer who has had the privilege of exploring the stunning landscapes of some of our national parks and other remarkable landmarks, I’ve witnessed both the breathtaking beauty of God’s creation and the not-so-beautiful behavior of fellow photographers and photo tour groups. It’s crucial that we, as photographers and photograph lovers, set an example for responsible and respectful photography in these precious environments. Here are some essential guidelines for proper photographer etiquette in natural settings:

  1. Respect Nature’s Fragility: The first and most important rule is to respect the environment. Stay on designated paths and trails to avoid damaging fragile ecosystems. Never pick plants, disturb wildlife, or leave any trace of your presence.
  2. Know the Rules: Different parks and landmarks may have specific regulations regarding photography. Familiarize yourself with these rules, such as restrictions on drone usage and tripods, access to certain areas, and photography permits. Complying with these rules not only preserves the location but also sets a positive example.
  3. Low Impact Photography: When photographing in delicate environments, use a tripod to minimize soil compaction, especially in sensitive areas. Avoid trampling on vegetation or disturbing the landscape to get the perfect shot. Keep your photography equipment in a backpack when not in use and don’t rest that backpack on vegetation or fragile shrubbery.
  4. Be Mindful of Wildlife: Respect the space and behavior of animals. Keep a safe distance and use a telephoto lens for close-up shots. Never approach or feed wildlife, as it can harm both you and the animals.
  5. Minimize Noise and Disturbances: Loud conversations (this is one of my pet peeves) and camera shutter noises can disrupt the peacefulness of natural spaces. Keep unnecessary noise to a minimum and consider using silent mode on your camera when appropriate and if possible.
  6. Share the Space: Popular landmarks can get crowded. Be considerate of other photographers, tourists, and nature enthusiasts. Allow others to enjoy the view and wait your turn when necessary. And when you’re done and have your photograph, move on and give someone else the opportunity of that viewpoint (this is another of my pet peeves).
  7. Leave No Trace: This principle extends beyond trash. Pick up any litter you find, and also be conscious of not leaving behind any photography equipment or props. Preserve the location for other guests and future generations.
  8. Limit Your Impact on Local Communities: If you’re visiting areas near local communities, respect their privacy and property. Seek permission before photographing on private land, and always follow any local rules and customs.
  9. Educate and Inspire: Use your photography to educate and inspire others about the beauty and importance of these natural landscapes. Share your knowledge and tips for responsible photography with fellow photographers.
  10. Lead by Example: As professionals, our actions carry weight. By practicing good photographer etiquette, we encourage others to do the same. Offer guidance and support to those who may be unaware of these principles.

Photography in national parks and other landmarks is a privilege that comes with responsibilities. Let’s strive to be stewards of these incredible places, ensuring they remain pristine for other guests and future generations to enjoy. By following proper photographer etiquette, we not only capture breathtaking images but also contribute to the preservation of these natural wonders.

Happy and responsible shooting!

Chris

Posted in Photography Tips & Techniques Also tagged , , , |

The Power of Candid Expressions: Infuse your Portraits with Authenticity and Emotion

Welcome to our photography blog, where we’re dedicated to helping you enhance your photography skills and artistic vision. In this installment, we’re delving into the world of candid portrait expressions—a powerful way to infuse your portraits with authenticity and emotion. Candid portraits go beyond posed shots, revealing genuine moments that tell stories and connect with viewers. Let’s dive into the world of candid portrait photography and learn how to capture those spontaneous, fleeting moments.

Tip 1: Establish Trust and Rapport. Building a comfortable and trusting relationship with your subject is the foundation of capturing candid expressions. Spend some time getting to know your subject before the shoot, engaging in casual conversation, and finding common ground. When your subject feels at ease with you, they’re more likely to reveal their true emotions, resulting in authentic and heartfelt moments.

Tip 2: Blend into the Background. To capture candid moments, it’s important to become an unobtrusive observer. Rather than directing every pose and expression, position yourself at a distance and use a longer lens if necessary. This allows your subject to relax and act naturally, forgetting about the camera’s presence. The goal is to become a fly on the wall, ready to capture the magic as it unfolds.

Tip 3: Timing is Everything. Candid moments are all about timing. Be patient and attentive, anticipating when interesting expressions or interactions might occur. Keep your finger on the shutter button and be prepared to capture those split-second reactions that can often convey the most genuine emotions.

Tip 4: Utilize Natural Environments. Choose locations that resonate with your subject and provide natural settings for candid moments to occur. Whether it’s a park, a bustling street, or a cozy cafe, the environment can inspire spontaneous interactions and expressions. Encourage your subject to engage with their surroundings, and you’ll capture a rich tapestry of emotions and reactions.

Tip 5: Embrace Imperfections. Candid portraits are all about embracing imperfections and capturing raw, unfiltered emotions. Don’t shy away from capturing genuine laughter, thoughtful expressions, or even moments of vulnerability. These authentic moments have a powerful impact and can create portraits that are both relatable and emotionally resonant.

Conclusion: candid expressions are a window into the soul, revealing layers of emotions and stories that posed shots might miss. By building trust, blending into the background, and timing your shots perfectly, you can capture the essence of your subject in their most natural state. So, step away from traditional poses, let go of perfection, and embark on a journey to capture candid moments that tell captivating stories through your lens.

Happy shooting!

Chris

BTW: you can always looks at a smattering of candid portraits on our SmugMug account. Or for the more formal portraits you can view our portfolio page.

Posted in Engagement Photography, Family Portraits, Photography Tips & Techniques, Portraits, Senior Portraits Also tagged , , |

The Power of Minimalism: Capturing Emotion Through Simple Photography

Welcome to our photography blog, where we’re dedicated to helping you enhance your photography skills and artistic vision. In this edition, we’ll explore the art of minimalism in photography—a technique that focuses on simplicity, clarity, and emotion. Minimalism can transform everyday scenes into powerful images that evoke deep feelings and resonate with viewers. Let’s delve into this captivating world and discover how to harness its potential.

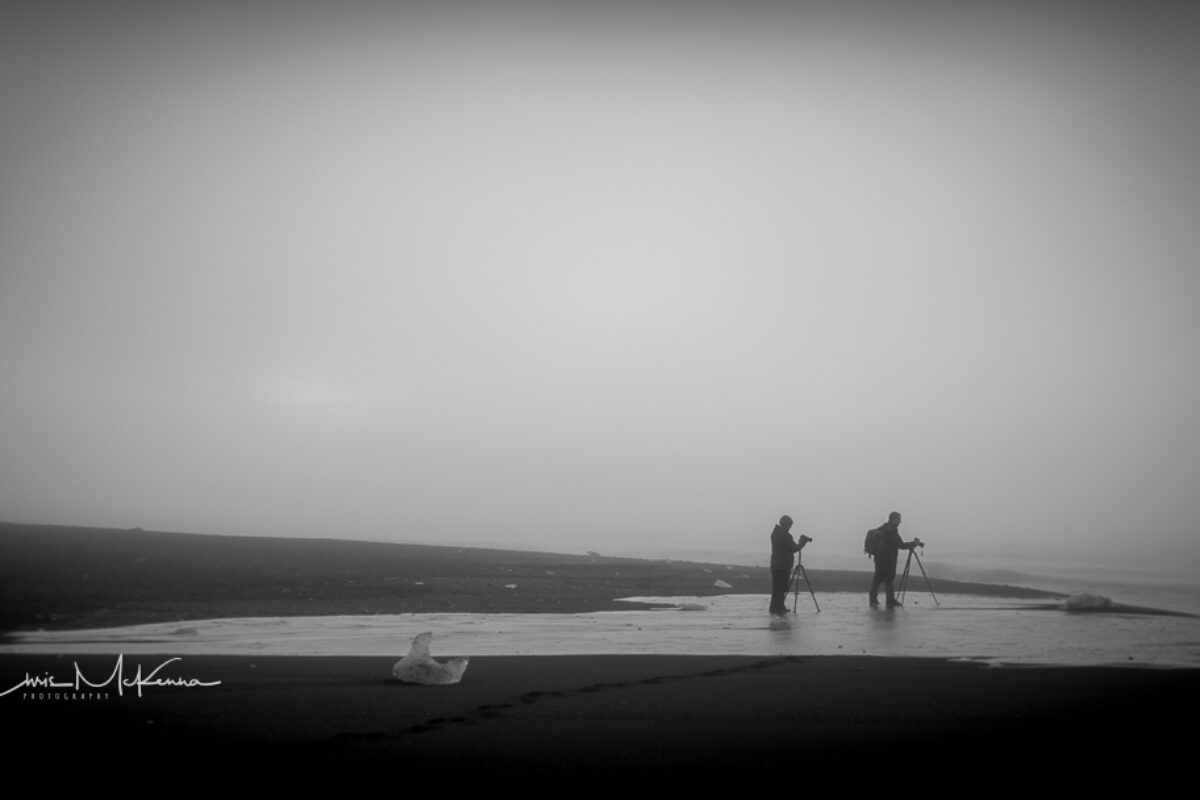
Tip 1: Embrace Negative Space. At the heart of minimalism is the concept of negative space—the empty areas in your composition that surround your main subject. By using negative space, you can draw attention to your subject and create a sense of tranquility in your photograph. Experiment with placing your subject off-center and allowing ample empty space around it, encouraging the viewer to reflect on the emotions and stories within the frame.

Tip 2: Keep It Simple. In minimalistic photography, less truly is more. Choose a single subject or element as your focal point, eliminating distractions and clutter from your frame. This allows your subject to stand out and speak for itself. Whether it’s a single flower, a lone tree, or a solitary person, simplicity can evoke profound emotions and engage the viewer on a deeper level.

Tip 3: Play with Lines and Shapes. Clean lines and geometric shapes play a crucial role in minimalistic compositions. Look for lines that guide the viewer’s eye through the image, adding a sense of structure and harmony. Experiment with using diagonals, horizontals, and verticals to create a dynamic balance that enhances the visual appeal of your photograph.

Tip 4: Focus on Details. Zooming in on small details can often yield powerful minimalist images. Capture textures, patterns, and intricate details that might otherwise go unnoticed in a cluttered scene. By focusing on these finer elements, you can create an intimate connection between the viewer and your photograph, inviting them to explore and appreciate the beauty in the ordinary.

Tip 5: Master Monochrome. Black and white photography is a natural fit for minimalistic compositions. Removing color from the equation emphasizes the play of light and shadow, as well as the contrast between different elements. Monochrome images have a timeless quality that can intensify the emotions conveyed in your photographs.

Conclusion: Minimalism in photography is an art form that challenges us to strip away the excess and reveal the essence of our subjects. By embracing negative space, simplifying compositions, and focusing on details, you can create images that evoke emotion, tell stories, and leave a lasting impact on your audience. So, pick up your camera and embark on a journey of creative exploration, capturing the beauty and emotion in the simplest of moments.

Happy shooting!

Chris

Posted in Photography Tips & Techniques Also tagged , |

Mastering Depth of Field: A Guide to Captivating Photography

Hello friends,

It has certainly been a long time since I wrote a photography tip and today I am feeling inspired. So in an effort to kick off my tips again, as a topic to share I am thrilled to delve into the fascinating world of depth-of-field and how it can elevate your photography skills to new heights. Understanding and controlling depth-of-field is essential for capturing breathtaking images that will leave a lasting impression on your audience. Let’s dive right in!

Tip 1: Aperture, the key to depth-of-field. One of the primary factors that influence depth-of-field is the aperture setting on your camera, assuming that you have the ability to control it. Aperture refers to the size of the opening in the lens through which light passes to reach the camera’s sensor. A wider aperture (smaller f-number) creates a shallow depth-of-field, resulting in a beautifully blurred background while keeping your subject in sharp focus. Conversely, a narrower aperture (larger f-number) produces a deeper depth-of-field and is ideal for landscapes or capturing a scene where you want as much in focus as possible.

Tip 2: Understanding the Impact of Focal Length. The focal length of your lens plays a significant role in determining the depth of field in your photographs. Shorter focal lengths (wide-angle lenses) tend to have a deeper depth-of-field, making them suitable for capturing expansive landscapes or group shots. On the other hand, longer focal lengths (telephoto lenses) create a shallower depth-of-field, perfect for isolating subjects and achieving stunning background blur.

Tip 3: Distance Matters. The distance between your subject and the background can greatly affect the depth-of-field in your images. The closer you are to your subject, the shallower the depth-of-field will be. To create captivating portraits with creamy bokeh, position your subject a moderate distance from the background and use a wide aperture. For landscape shots, increase the distance between your subject and the background, and consider using a smaller aperture for greater sharpness throughout the scene.

Tip 4: Manual Focus. While autofocus is a fantastic feature in modern cameras, there are times when you may want to take control of the focus for precise depth-of-field. Switching to manual focus allows you to fine-tune the point of focus, ensuring that your subject is tack-sharp and the background beautifully blurred, thereby enhancing the overall aesthetic of your photograph.

Tip 5: Experiment with Foreground Elements. Incorporating foreground elements can add depth and interest to your photos. By positioning objects closer to the camera and using a wide aperture, you can create a sense of depth and lead the viewer’s eye towards the main subject. This technique is especially useful in landscape and street photography, where it adds a three-dimensional feel to your images.

And it goes without saying that in order to keep your photographs sharp and in-focus, try to use a tripod and a shutter release cable or remote whenever possible. This will help eliminate any movement of the camera during the actual image capture.

Conclusion: Mastering depth-of-field is an essential skill for photographers seeking to add artistic flair to their work. By understanding the relationship between aperture, focal length, and subject distance, you can create images that truly stand out. Don’t be afraid to experiment, as each scenario presents a unique opportunity to express your creativity and tell compelling visual stories through your lens. So, grab your camera, apply these tips, and watch your photography skills soar to new heights!

Happy shooting!

Posted in Photography Tips & Techniques Also tagged , , , , |

Repost: Improving Your Photography by Having Go-To Places

Hi Friends,

It’s been so long since I have posted any tips here, been way to busy with work, play, fun–life in general. Having said that, I found a great article that I thought was worth sharing. What this article is essentially saying, is that by having a specific location that you love, you can improve your photography by visiting it over-and-over again in various conditions (lighting, weather, season) without having to go out and look for somewhere to shoot. When you have a particular place to go, you are not wasting precious time looking for that particular place.

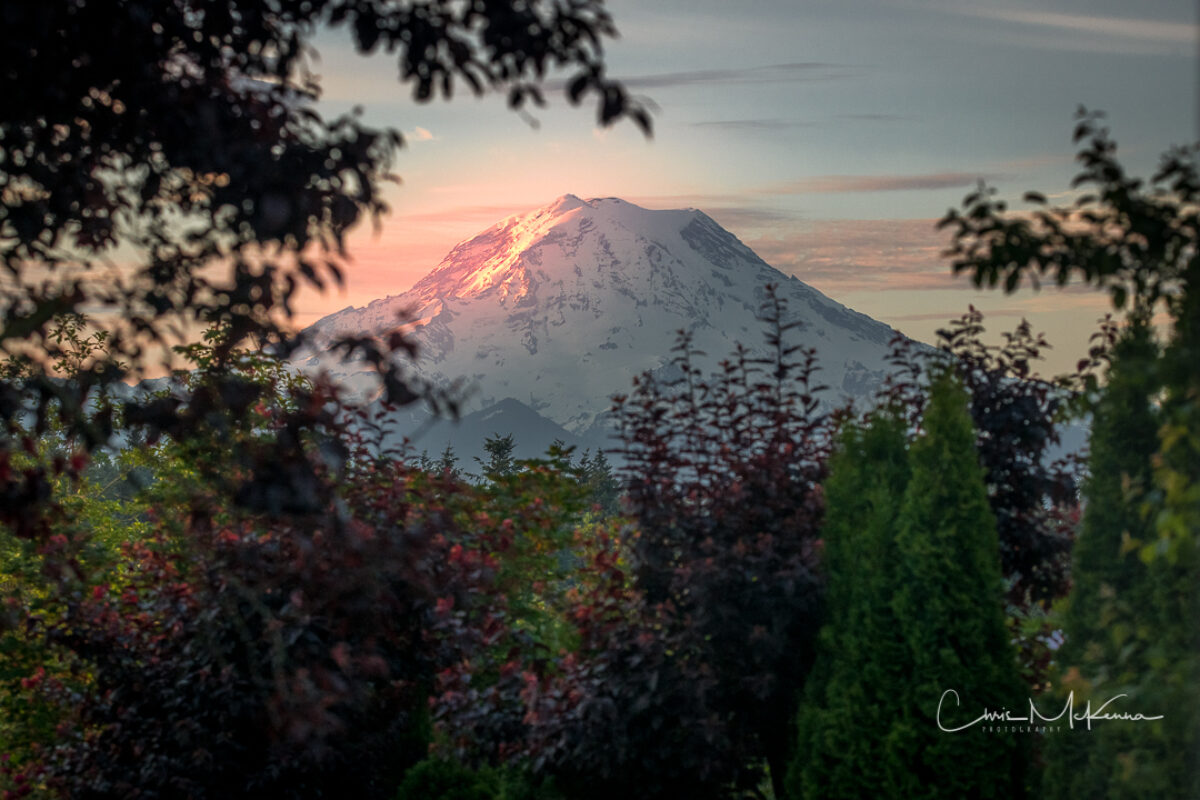
While not an actual spot (there are way too many), my go to place is Mt. Rainier in Washington State. I live about an hour or so from 2 different entrances, so it is very convenient for me to get in the car and go at just about any time.

The link below will take you to the article. Hope you enjoy.

Blessings,

Chris.

http://digital-photography-school.com/improve-your-photography-by-having-go-to-places-to-shoot/

Posted in Photography Tips & Techniques Also tagged , , , , , |

SLR Lounge Lightroom Preset Review

Over the years, many people have asked me about my workflow for my images. I generally tell them about Lightroom and Photoshop, leveraging those tools to get the best images possible. I also tell them that with Lightroom, finding a “recipe” or a preset that work for their style will greatly improve their overall workflow and speed up their finishing process.

I own a few presets packages for Lightroom, with one of them standing out above all the rest: the SLR Lounge Lightroom Presets. Without question, these presets are the best that I have found and always provide me with the results that I envisioned when I originally pressed the shutter button on my camera. Their presets have saved me countless hours of finishing work (moving from hours to minutes) and saved me from having to spend a lot of time in Photoshop (something I don’t like to do). The lessons that come with the system not only taught me how to use their presets but gave me confidence to use Lightroom as my primary edit tool.

I have been using SLR Lounge presets for about 2 years now, and will continue to use them as long as I take photographs.

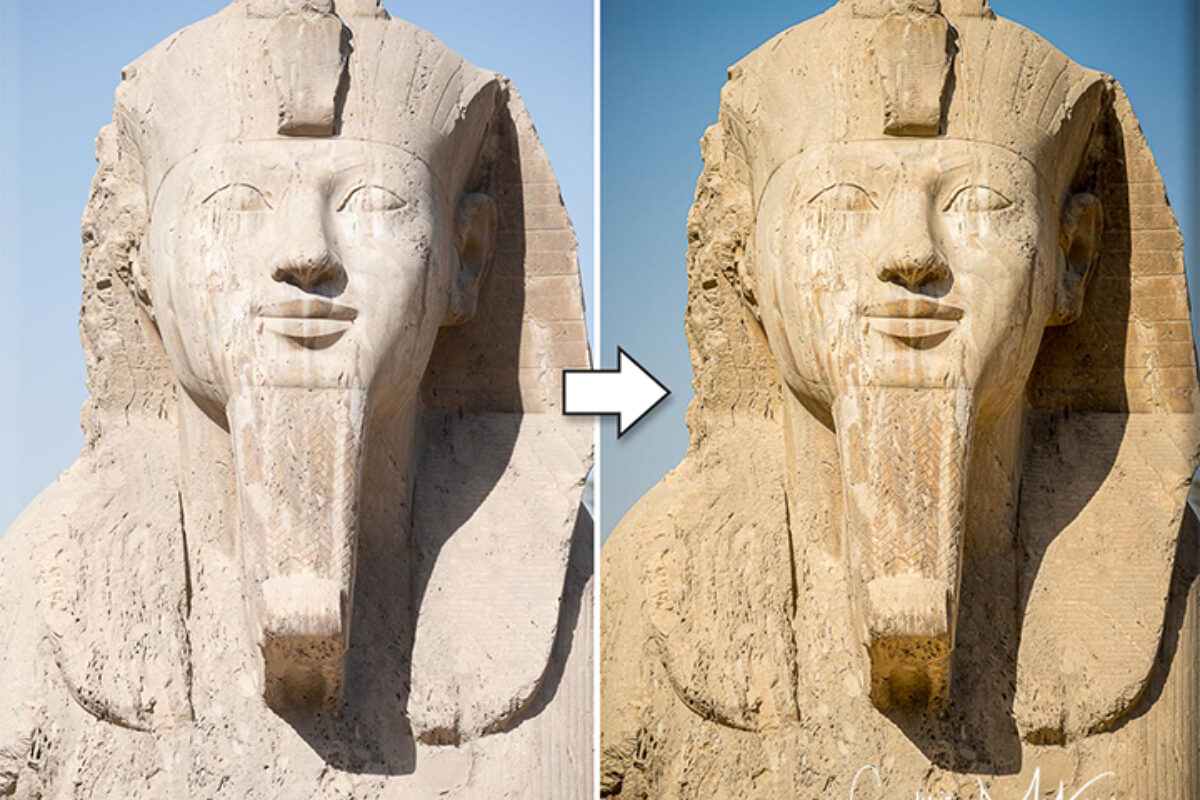
Below is a before/after example of a photograph I recently took using the HDR SLR Lounge Presets for Lightroom.

Good job guys!

If you are interesting in purchasing them for your own use, you can purchase them at this link: http://www.slrlounge.com/lightroom-presets

Blessings,

Chris

Before-After SLR Lounge


Posted in Photography Tips & Techniques Also tagged , , , , , , , |

Shooting Locally

As you are aware, I love landscape photography. The lure of a faraway place-someplace of beauty, splendor, or mystique-often calls me. But like most people, I have a very limited budget for travel, and thus never get quite the opportunities, not to mention the time away from work and other obligations. So, when the itch to take a photograph strikes I have to scratch it. But I get bored, bored, bored of the city I live in–there is really nothing here and what is here are all quite familiar. I have to find another way to satisfy the craving.

One way to satisfy the craving is to find a new way to photography the same subject.

Because local locations are, well, local, our perception is that they are not the “once-in-a-lifetime” experience. And because of that, it should remove the pressure to get that shot we all seek. This should give us the freedom to explore without the fear of coming away with nothing. If we do come away with nothing, that’s OK since we can always go back. This will give you the opportunity to learn from the mistakes you made. And as an added benefit, exploring the same area during different times of day or season of the year presents you the opportunity to see how things might change and give you the opportunity for a different look and/or feel to the subject.

Anyway, I hope that you can see that shooting locally is a good alternative to shooting nothing when shooting at the “exotic locale” is not an option and a great way to hone your skills without breaking the bank. I am trying to live by my own advice and get out in my town a little bit more, I hope you do too.

Happy shooting and as always, blessings.

Chris


Posted in Architectural, Landscape and Nature Photography, Photography Tips & Techniques Also tagged , |

How to Save Big Money by Not Hiring a Professional Wedding Photographer

Good morning, Friends.

Talk to any professional wedding photographer and they will tell you that one of the biggest challenges they face two fold: first, the notion from potential clients that I can save big money if they do it themselves (that is taking your own photographs) and a very closely related second, the cost of a professional photographer is just too much money. Well, I’m not going to get into the why a professional wedding photographer costs money (there are plenty of blog postings that break down everything from the cost of professional knowledge and expertise, marketing, equipment, time, etc., etc.) but I would like to share something that came across my desk yesterday.

As you know, I am not one who regularly reposts other’s blog, but every once in a while something comes along that is worth sharing.This post will explain the monetary benefits you will reap by doing your own wedding photographs. I hope that you enjoy it as much as I did. Click on the link below to view the post.

http://petapixel.com/2013/10/04/save-big-money-hiring-professional-wedding-photographer/

Keep in mind my post is not intended to offend anyone, just provide a good humored look at things to take into account when considering taking your own wedding photographs. I can’t speak for the intent of the original author, however. 🙂

Blessings,

Chris

Posted in Event Photography, Photography Tips & Techniques, Wedding Photography Also tagged , |

15 Must See Cheatsheets and Infographics For Photographers

Good day friends.

I hope that you have had as enjoyable a Monday as you could possibly have. It’s hard to ease back into a week after a gorgeous weekend-isn’t it? But we do what we can to make it better. For me, it is sometimes looking at pictures I took over the weekend or perhaps even reading through blogs and posts. When looking around, I usually find something that makes me chuckle, makes me mad, makes me sad, and sometimes ponder a question or think about a subject and contemplate on it.

Every once in a while, I stumble across information that is just incredible and must share (most of it not on this blog but through facebook or twitter). However, as you are keenly aware, I am very hesitant to plug anyone else’s products or services, or even their information for that matter on my own blog. I don’t want my blog to become a message board for others to peddle their wares or a cornerplace for spam and junk. But when I do find something that is worth sharing to my audience, I first wish that I had come up with it myself 🙂 but then I want to give credit where credit is due and share that information.

Such is the case with this tidbit of information: 15 Must See Cheatsheets and Infographics for Photographers. Click on the link below to go to it.

15 Must See Cheatsheets and Infographics For Photographers

There is a lot to know when it comes to photography, everything from color temperature to depth-of-field, from tonal range to the 3 elements to exposure, and everything in between. This post does a wonderful job of graphically illustrating some of those various topics.

I strongly encourage you to take a look and glean whatever information you can.

Blessings to you (and enjoy the remainder of your day),

Chris.


Posted in Photography Tips & Techniques Also tagged |

Macro Photography Extension Tube Review

Back in April, I posted a tip about cheap macro photography. Well, I broke down and had to try it myself. Not owning a Macro lens, I purchased a series of extension tubes and some close-up filters for my 24-105mm Nikkor lens.  The results? Mixed.

This particular post is about the macro extension tubes I purchased: Vello Auto Extension Tube Set for Nikon cameras. You can purchase them at B&H Photo for $79.95 (http://www.bhphotovideo.com/c/product/787224-REG/vello_ext_nd_auto_focus_ext_tube.html)

I am posting here a series of photographs that I took using my Nikon D800 DSLR camera and a variety of lenses. I used a 50mm, a 70-200mm, a 24-105mm (all Nikkor) and a Tamron 28-75mm. And for the most part, I tried to photographs flowers in the garden, which posed numerous challenges such as lighting and wind. Over the course of the 3 days I tried to photograph, I could not get the wind to cooperate–it would just not stop blowing. That is until I put everything away. Another challenge that I had was the precise aiming of the camera and lens while on the tripod. You see, my tripod is just not designed to fine tune height and direction.  And of course, I had to do this with all the extension tubes on the camera.

The next test was to remove two of the tubes and use just the 50mm Nikkor lens. These results were much more satisfactory, although I could not get the zoom I want. Exact focus is an issue that must be dealt with too. Of course, read any text on macro photography and focus and Depth-of-Field will always be an issue. The answer: focus stacking, that is taking multiple exposures with different focal points and then combining those photographs in Photoshop or another program (that subject is out of scope for this blog).

Now, keep in mind that I did not try just one of the elements on any of my other lenses, just the 50mm.

Light is another issue that must be considered. Even though I was shooting in full daylight, I had to pump up my ISO to 800. And even though Vello claims that the lens info will be passed onto the camera thus being able to I found that my camera’s metering got somewhat out-of-whack and I had to make adjustments to exposure.

I was pleased with the results-I mean what more could I ask for for $80. I would still like to try a true macro lens, but I think that I will wait a while before shelling out the bucks to buy one and just make use of these tubes.

So the photographs posted below, the flower photographs are with the combined use of the 3 tubes, while the remainder are with just the 12mm tube. The only adjustments I made to these photo’s are exposure, contrast, a bit of sharpening and noise reduction. I did not crop any of these so you can get a sense of the magnification.

Next blog post will be about the close-up filters.

Blessings,

Chris

P.S. The photograph of the dogs eye has the camera reflection of Lynette digging in the garden. Awesome!

Posted in Landscape and Nature Photography, Photography Tips & Techniques Also tagged , , , |